
The holiday season often brings a flurry of activity, from planning gatherings to finding that perfect gift for everyone on your list. While store-bought items have their place, there is something profoundly special about receiving a handmade gift. Metal art, with its durability and industrial elegance, offers a unique way to show you care.
Creating metal art might seem intimidating at first, conjuring images of heavy machinery and intense heat. However, many projects are accessible even to beginners and require minimal tools. Working with metal allows you to transform raw, rigid materials into something expressive and beautiful. The satisfaction of bending, cutting, and shaping a piece of metal into a functional or decorative object is unmatched.
This guide explores accessible metal art projects that make thoughtful, lasting gifts. Whether you are an experienced crafter or stepping into the workshop for the first time, these ideas are designed to be achievable and rewarding. By the end, you will be equipped to create personalized treasures that your friends and family will cherish for years to come.
Metal Art Creation for the Holiday Season
Essential Tools and Safety First
Before diving into specific projects, it is crucial to establish a safe and functional workspace. Metalworking involves sharp edges and potential hazards, so proper preparation is non-negotiable.
Safety Gear:
- Safety Glasses: Metal shards and dust can be unpredictable. Protect your eyes at all times.
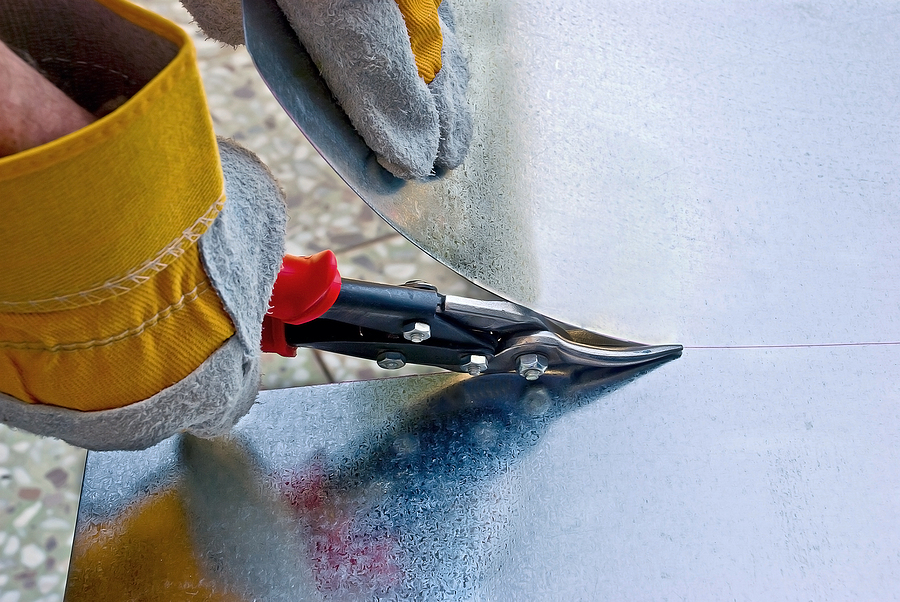
- Gloves: Heavy-duty leather or cut-resistant gloves are essential for handling raw materials and protecting your hands from sharp edges.
- Hearing Protection: Cutting and hammering metal can be loud. Earplugs or earmuffs will protect your hearing during extended sessions.
- Appropriate Clothing: Wear long sleeves and pants made of natural fibers (like cotton) to protect your skin. Avoid loose clothing that could get caught in tools.
Basic Tools:
- Metal Shears or Tin Snips: These are necessary for cutting thinner sheets of metal.
- Files and Sandpaper: Essential for smoothing rough edges and refining shapes.
- Hammer and Mallet: A ball-peen hammer is versatile for shaping, while a rubber or wooden mallet allows you to strike metal without leaving marks.
- Pliers: Needle-nose and locking pliers help you grip, bend, and manipulate small pieces.
- Drill and Metal Bits: Required for making holes, which are often needed for assembly or hanging.
Project 1: Simple Metal Picture Frames
A photograph captures a memory, but a handmade frame gives it a home. Metal picture frames offer a modern, industrial aesthetic that complements a wide range of interior styles. This project is excellent for beginners because it focuses on measuring, cutting, and simple bending.
Materials:
- Sheet metal (aluminum, copper, or galvanized steel)
- Metal ruler
- Scoring tool or awl
Instructions:
- Measure and Mark: Determine the size of the photo you wish to frame. Add two inches to each side for the border and bending allowance. Use your ruler and scoring tool to mark these dimensions clearly on the sheet metal.
- Cut the Shape: Carefully use your tin snips to cut out the large rectangle. Be mindful of the sharp edges immediately after cutting.
- Create the Opening: Mark the inner window for the photo. Drill a starter hole in the center of this window area, then use your snips to cut out the opening.
- Texture and Shape: Before bending, you can add texture to the metal surface using a hammer or by scratching patterns with wire wool.
- Bend the Edges: Using a sturdy table edge or a block of wood as a guide, fold the outer edges back to create a finished look and structural rigidity. If you want a standing frame, bend a separate strip of metal into a kickstand and attach it to the back with strong adhesive or rivets.
Get a Free Cash Offer for Your Scrap Metal Pieces ☑
Project 2: Personalized Metal Keychains
Small, functional, and deeply personal, a metal keychain is a fantastic stocking stuffer. This project allows for significant creativity through stamping letters, numbers, or symbols.
Materials:
- Small metal blanks (brass, copper, or aluminum tags)
- Metal letter stamp set
- Key rings
- Polishing cloth
Instructions:
- Prepare the Blank: Secure your metal tag to a steel bench block or a heavy, flat surface using tape. This prevents the metal from moving when you strike it.
- Plan Your Design: Use a piece of tape across the tag to serve as a guideline for your text. This helps keep your letters straight.
- Stamp: Place the stamp vertically on the metal. Strike the top of the stamp firmly and squarely with a hammer. One solid hit is usually better than multiple taps, which can cause “ghost” images.
- Highlight the Text: To make the stamped impression pop, fill the indented letters with a permanent marker or specialized enamel darkening ink. Wipe away the excess ink from the surface, leaving the dark color only in the grooves.
- Finish: Drill a small hole at the top if one isn’t present, polish the tag to a shine, and attach the key ring.
Project 3: Decorative Metal Candle Holders
Candle light adds warmth to any room, and a metal holder amplifies that glow with reflective surfaces. This project involves bending and shaping wire or thin metal strips to create sculptural forms.
Materials:
- Heavy-gauge wire or metal strips
- Round object (like a pipe or bottle) for shaping
- Wire cutters
Instructions:
- Form the Base: Create a stable base by spiraling thick wire into a flat coil or bending a metal strip into a wide circle. Stability is key here, as you do not want the candle to tip over.
- Create the Cup: Wrap the wire or strip around a mandrel (like a broom handle or pipe) that matches the diameter of the candle you intend to use. This forms the cup that will hold the candle.
- Connect Base and Cup: If using wire, you can create a continuous design where the wire flows from the base up to the cup. If using strips, you may need to use rivets or a strong metal epoxy to join the two parts.
- Artistic Flourish: Use pliers to twist the connecting sections into decorative spirals or geometric shapes. The metal creates beautiful shadows when the candle is lit.
Finishing Touches for Your Metal Gifts
The difference between a raw project and a polished gift lies in the finishing.
- Smoothing: Never skip the filing stage. Run your finger (carefully) along edges to ensure there are no burrs that could snag clothing or scratch skin. Start with a coarser file and move to fine sandpaper for a satin finish.
- Polishing: A polishing compound and a soft cloth can transform dull metal into a mirror-like surface. For a more rustic look, you might choose to leave the natural patina or even encourage oxidation.
- Sealing: Metal can tarnish or rust over time. Applying a clear coat of lacquer or wax seals the metal, preserving your finish and protecting the recipient’s furniture.
Give New Life to Old Metal
One of the most rewarding aspects of metal art is the potential for upcycling. Before you buy new sheets or wire, look around for scrap. Old baking sheets, wire hangers, or leftover piping from home repairs can often be cleaned and repurposed into stunning art. This not only saves money but also adds an environmentally friendly narrative to your gift.
When you have finished your projects, you will likely have offcuts and scraps. Rather than throwing these in the trash, ensure they are disposed of responsibly. Metal is highly recyclable, and keeping it out of landfills is a crucial step in environmental stewardship.
Crafting Memories with Metal
Creating metal art for holiday gifts is a gesture that speaks volumes. It shows a willingness to invest time, effort, and creativity into something unique. These projects—picture frames, keychains, and candle holders—are just the beginning. As you become more comfortable with the tools and materials, your ability to manipulate metal will grow, opening the door to even more complex and rewarding creations.
Whether you are crafting a sleek, modern frame or a rustic, hammered keychain, the recipient will appreciate the durability and craftsmanship of a handmade metal gift.
Ready to recycle your scrap? If your creative session has left you with leftover metal scraps, don’t let them go to waste. Responsible disposal is part of the crafting lifecycle. For those in the Indianapolis area, Garden City Iron & Metal makes it easy to do the right thing. Contact Us Today to turn your scrap metal into a sustainable choice.
Call Now for a Free Assessment
Related Post: Unleash the Potential Applications of Recycled Scrap Metal